This final example will show you how to build a micro blog service with only a few nodes in Node RED. You’ll be using the MongoDB node as a storage for posts, http nodes to provide end points for the service and the html node to format the micro-blog web page.
We will use a free cloud service called “mongolab”. It allows you to create “sandbox” databases you can use to prototype your applications. Head over to https://mongolab.com. Register for an account. You will then be able to create a database. Click on “Create New” in your home dashboard.
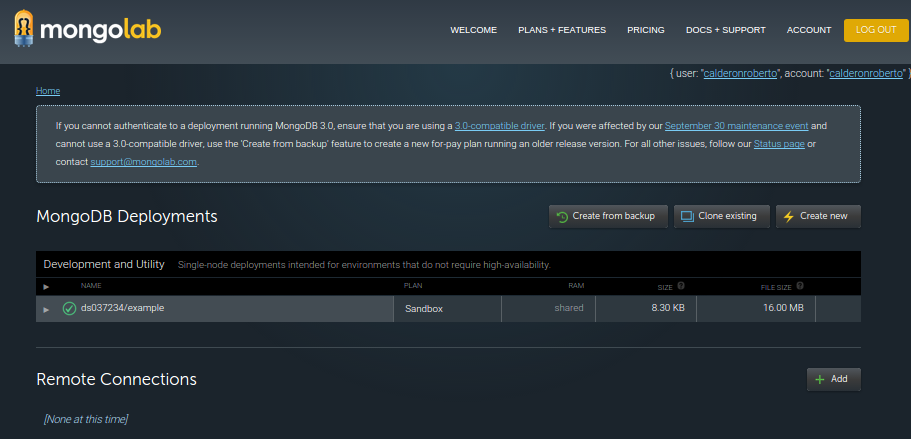
Figure 6.32 Creating a free MongoDB at mongolab
Fill out the form to create a new MongoDB deployment. Select Amazon, Single-node and select the FREE size of 500mb.
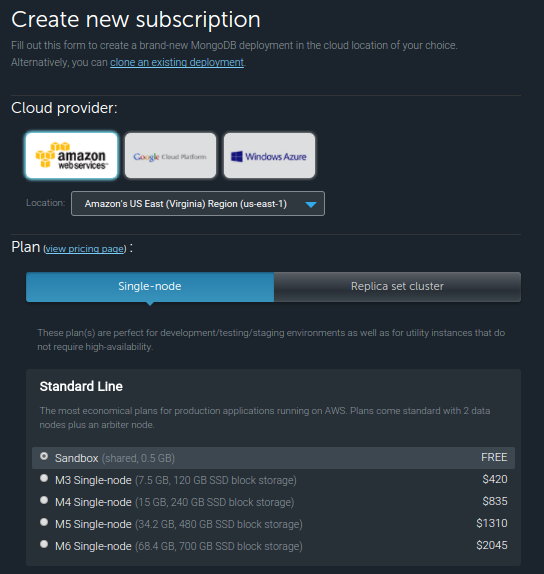
Figure 6.33 Choosing the free MongoDB
Scroll down and name your database. We are naming it “mycontent”. Now click on Create new MongoDB deployment:
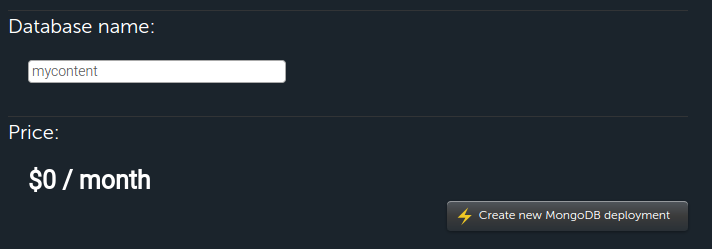
Figure 6.34 Name the free MongoDB
MongoDB allows you to create “collections” for each database. They are analogous to “tables” in relational databases, each “collection” holds “documents” analogue to “records” in relational databases. In order to begin using your database you need to create a new collection. Select your newly created database in your dashboard and add a new collection. We will name it “posts”.
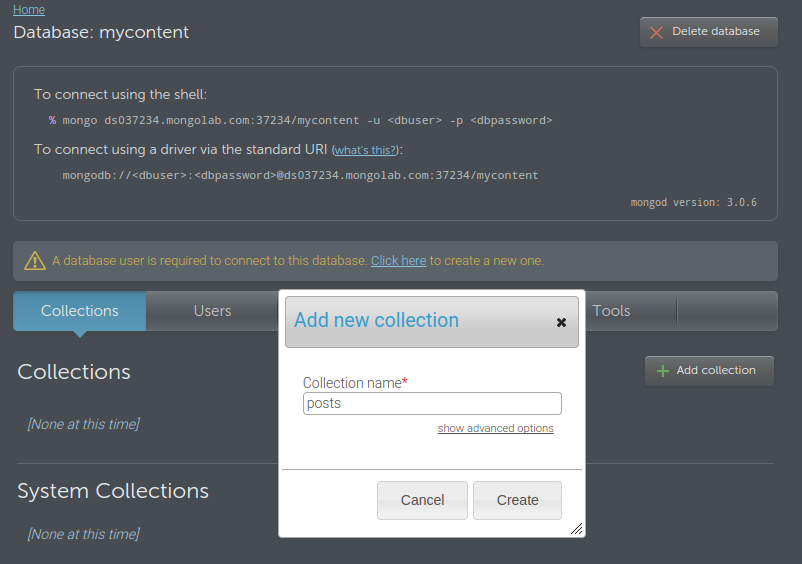
Figure 6.35 Adding a collection to the MongoDB
Finally, you will need a user to connect to that database. Add a new database user. We will name it “freduser” but you should use a name that makes sense to you.
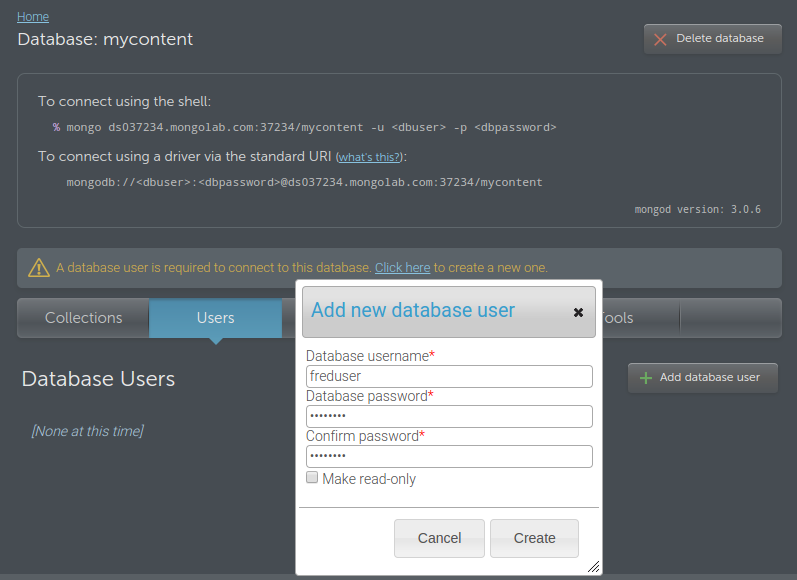
Figure 6.36 Adding a user to your MongoDB
Finally, note how this page also gives you important information on how to connect to your MongoDB database. We will need the URI (in our case ds037234.mongolab.com), the port (37234 in our case) and your newly created user and password.
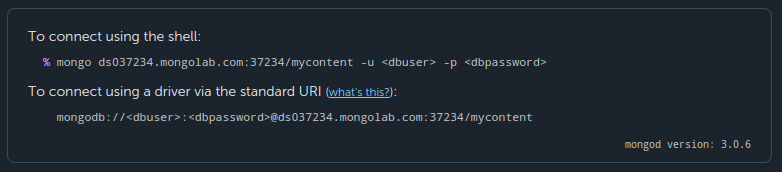
Figure 6.37 Note down the connection info for your new MongoDB
Now, head over to Node-RED and wire up a http-in, mongodb-in, a template, and an http-out node as shown in Fig. 6.38.
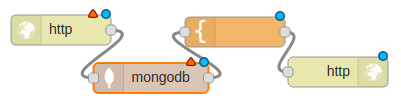
Figure 6.38 The basic flow for the micro-blog
Edit the http-in node to accept GET request on the URL “/public/posts” (Fig 6.39)
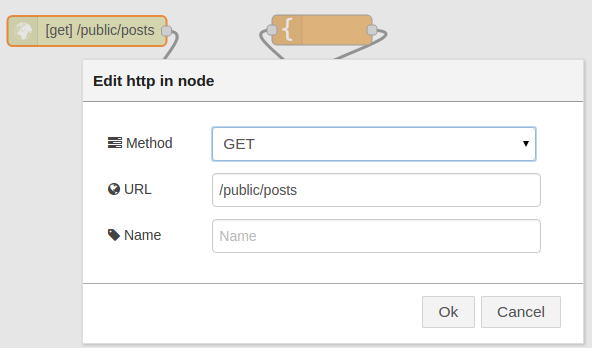
Figure 6.39 Setting up the http node to accept requests on /public/posts
We will now configure our mongodb in node. Double click on the node and create a new server connection. Here is where you will use the information from your mongolab instance:
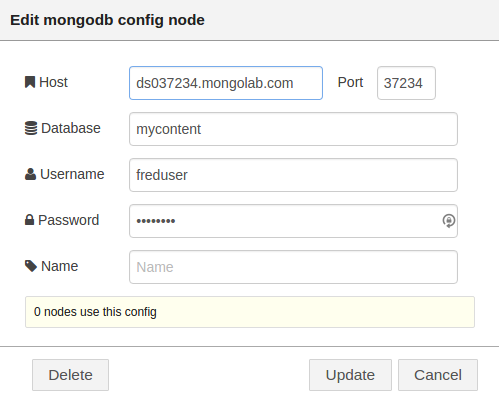
Figure 6.40 Configuring the mongodb node using the MongoDB account info
Click on Create/Update and configure your node to use the “posts” collection you created. Configure it to do a “find” operation, which will find all documents in that collection. We will now name it “find posts”.
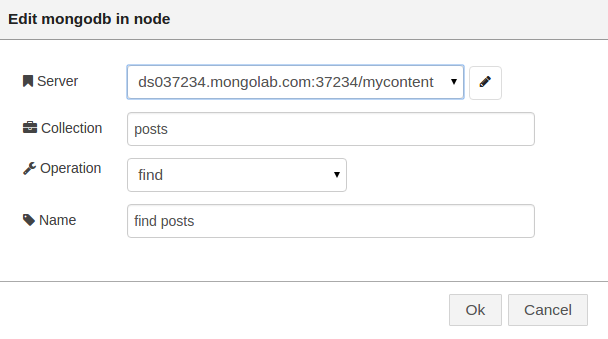
Figure 6.41 Configuring the mongodb node with the collection and the find operation
Once you have the http node and the mongodb nodes configured you can edit the html template node to handle the data returned by the mongodb node (Listing. 6.9):
Listing 6.9 Formatting the blog posts
And add the following code:
- <!DOCTYPE html>
- <html lang=”en”>
- <head>
- </head>
- <body>
- <h1>My Micro Blog</h1>
- <form action=”posts” method=”post”>
- <label for=”title”>Title</label>
- <input type=”text” class=”form-control” name=”title” placeholder=”Title…” />
- <label for=”post”>Post Content</label>
- <input type=”text” class=”form-control” name=”post” placeholder=”Say something…” />
- <button type=”submit” class=”btn btn-default”>Submit</button>
- </form>
- <div>
- {{#payload}}
- <div class=”post”>
- <h3>{{title}}</h3>
- <p>{{post}}</p>
- </div>
- {{/payload}}
- </div>
- </body>
- </html>
This code, while long, is very simple. You will be using Bootstrap to style your website (http://getbootstrap.com/) and provide a responsive layout. If you now visit http://{your user name}.fred.senstecnic.com/api/public/posts you will be able to see your new blog site (Fig 6.42). However there is no content yet.

Figure 6.42 Output from the micro-blog html template node
So far, you’ve created the flow needed to display posts. Now you need to create the other side of the blog service, a flow to create posts and save them to your MongoDB collection. Connect an http-in, a function, mongodb-out, and http-out nodes as shown in the bottom part of Fig 6.43.
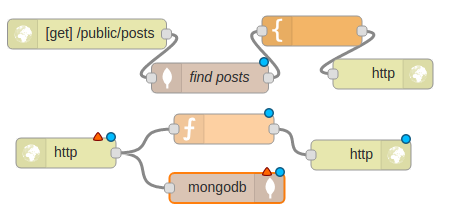
Figure 6.43 Setting up a flow to allow you to post blog entries and store them in MongoDB
Edit the http-in node to accept PUT requests at /public/posts (Fig 6.44)
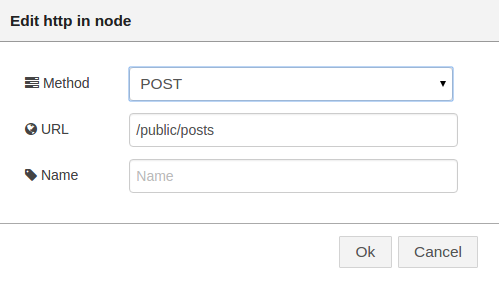
Figure 6.44 Setting up the end point for posts for the micro blog service
Now let’s edit the function node and add the following code (listing 6.10). This builds a simple http msg.header which your flow will pass to the http node.
Listing 6.10: Building a http request for the micro-blog service
- msg.headers = {
- “Location” : “https://{your username}.fred.sensetecnic.com/api/public/posts”
- };
- msg.statusCode = 302;
- return msg;
Note that at line 2 you set the address to be the end point for your service. This will use your user name in place of ‘guides’.
Finally, you will need to edit the mongodb-out node and select your previously configured server. Configure it to use the collection “posts” and an “insert” operation. Make sure to check “only store msg.payload object”, this will make sure we only store the data in the message payload, not the whole message object (fig 6.45).
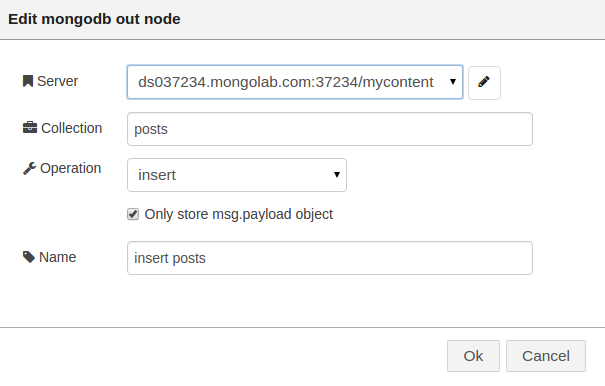
Figure 6.45 Configuring the mongodb node to store the incoming blog postings
That’s it! You can now go to your url and use your micro blog site where you’ll see something similar to Fig 6.46.
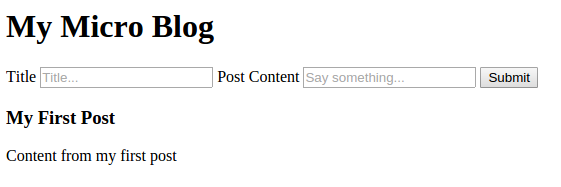
Figure 6.46 Screen show of the simple micro-blog web page
Summary
In this lecture you have seen a number of more complex flows that build on the nodes and techniques introduced in earlier lectures. In particular, you’ve seen how to scrape data from a commercial web site and query web-based APIs, how to use context and message in more complex ways and how to build a simple web service to support a micro-blog. The next lecture will conclude our intermediate section (lectures 4-7) by introducing various techniques for creating User Interfaces (UI) with Node-RED.
BACK to main Lecture 6